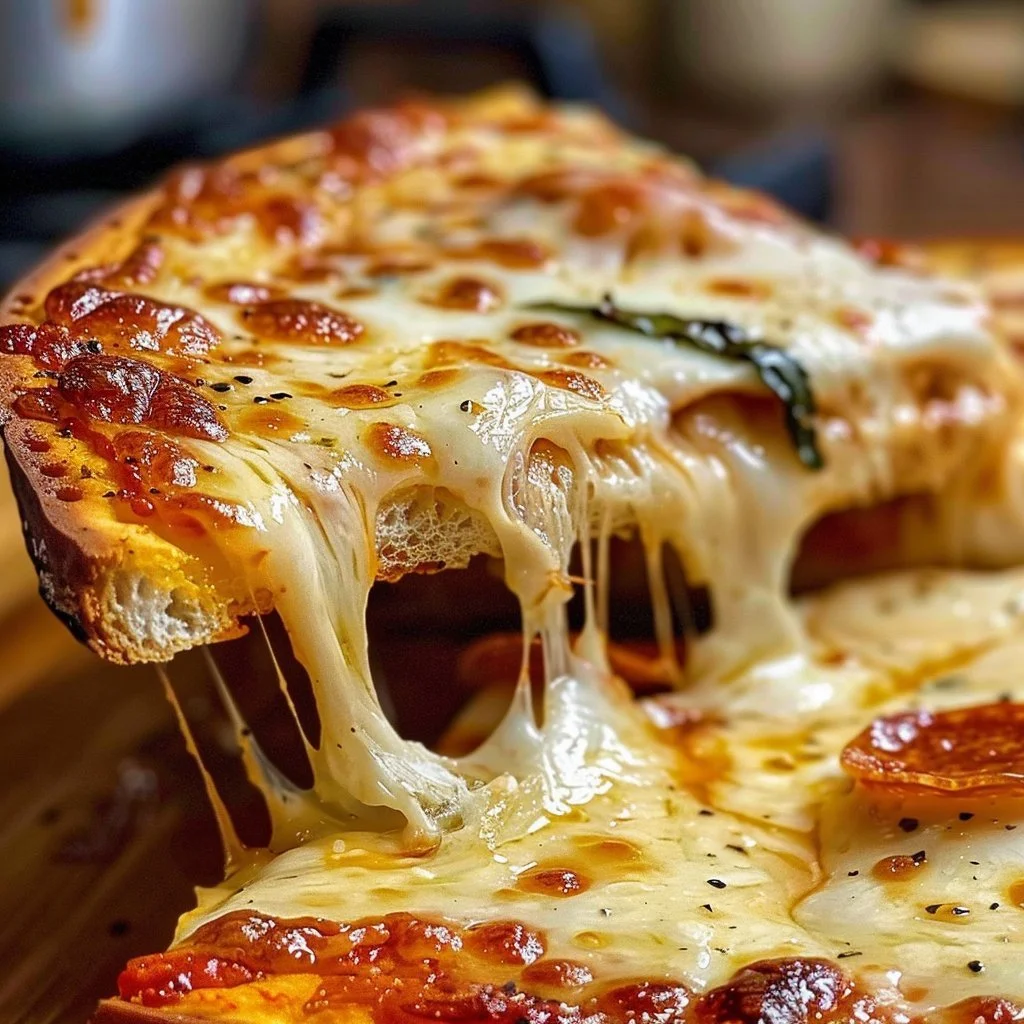
Homemade Easy Cheesy Pizza Pockets
When it comes to quick and tasty meals that are perfect for the whole family, nothing hits quite like Homemade Easy Cheesy Pizza Pockets. Imagine the enticing aroma of freshly baked dough mingling with the savory scents of melting cheese and zesty tomato sauce wafting through your kitchen. The delightful golden-brown exterior encases a piping hot, gooey filling that’s sure to elicit smiles and ensure happy tummies. Whether it’s a busy weeknight dinner or a weekend gathering with friends, these cheesy delights come together effortlessly, allowing you to enjoy great food without spending hours slaving away in the kitchen. So gather your loved ones, roll up your sleeves, and let’s dive into creating these delectable pizza pockets!
Understanding this Recipe
Homemade Easy Cheesy Pizza Pockets originate from the classic hand-held pizzas we’ve all come to love. Often associated with childhood memories of snack time or quick dinners, pizza pockets blend the traditional flavors of a pizza with a portable theme that’s perfect for on-the-go eating. These little bundles of joy can be filled with any combination of cheese, meats, or vegetables your heart desires, making them versatile and customizable for every palate. Plus, they can serve as a great way to utilize leftover ingredients, ensuring that nothing goes to waste.
These pizza pockets can be made using various techniques, whether you’re frying them up for a crispy finish, baking them for a healthier twist, or even throwing them in an air fryer for ultimate convenience. The result? An irresistible pocket of cheesy goodness that oozes flavor with every bite. Typically served warm, they are perfect as a fun addition to parties, lunchboxes, or as a delightful appetizer during game nights. And for those who want an extra special touch, consider pairing them with rich marinara sauce for dipping!
Why You’ll Love This Recipe
Making Homemade Easy Cheesy Pizza Pockets is not only enjoyable but rewarding. Here’s why this recipe should find a permanent place in your kitchen:
Ease of preparation: This recipe requires minimal ingredients and steps, making it ideal for cooking with little ones or on a busy evening.
Flavor complexity: The combination of melty cheese and your favorite pizza toppings creates a burst of flavors that are satisfying and pleasurable to the palate.
Family-friendly or kid-approved: Whether you have picky eaters or adventurous foodies, these pizza pockets allow everyone to enjoy their preferred fillings, increasing the likelihood of clean plates.
Budget-friendly or ingredient flexibility: With simple ingredients and the ability to modify fillings based on your pantry staples, this recipe won’t break the bank.
Make ahead and store: You can prepare them in advance, freeze them, and reheat whenever the cravings hit—perfect for meal prep!
Let’s Cook Homemade Easy Cheesy Pizza Pockets!
To create your own batch of Homemade Easy Cheesy Pizza Pockets, follow this quick overview to get you started. You’ll need basic kitchen tools like a rolling pin for dough and an oven for baking. With just about 30 minutes of prep time and another 15 minutes of cooking, you’ll have a scrumptious dish ready for everyone!
Ingredients
- Pizza Dough: You can use store-bought or homemade dough for texture and flavor.
- Shredded Cheese: Choose mozzarella for that classic gooeyness, or mix in cheddar for an extra kick.
- Pizza Sauce: A flavorful sauce adds a delicious layer—tomato marinara is a perfect choice.
- Toppings: Customizable! Consider pepperoni, bell peppers, mushrooms, or spinach.
- Olive Oil or Cooking Spray: Essential for a golden crust and to prevent sticking.
Directions
Preheat the Oven: Begin by preheating your oven to 400°F (200°C). This will ensure your pizza pockets bake evenly and develop that perfect golden-brown color.
Prepare the Dough: Roll out your pizza dough on a floured surface until it’s about ¼ inch thick. Use a pizza cutter or knife to slice it into squares or circles, approximately 4–6 inches wide.
Add the Filling: Take a piece of dough and place a small spoonful of pizza sauce in the center. Layer on your cheese and any additional toppings you like. Be careful not to overfill!
Seal the Pockets: Fold the dough over the filling to create a pocket shape. Use your fingers to pinch the edges tightly, ensuring the filling doesn’t escape while baking. You can use a fork to crimp the edges for an extra seal.
Prepare for Baking: Lightly brush the tops with olive oil or spray them with cooking spray. This will help create that appetizing golden-brown look.
Bake: Place the pizza pockets on a lined baking sheet and bake in the preheated oven for about 15 minutes, or until they are golden brown and the cheese is bubbling.
Cool and Serve: Once baked, allow the pizza pockets to cool for a few minutes. Serve them warm with extra pizza sauce for dipping and enjoy the cheesy goodness!
What to Serve With Pizza Pockets
These Homemade Easy Cheesy Pizza Pockets are fantastic on their own but can be complemented with a side of fresh salad, making for a well-rounded meal. Pair them with crispy garlic bread for added indulgence, or a side of creamy ranch dressing to elevate the dipping experience.
Fresh Salad: A light, mixed greens salad with a tangy vinaigrette contrasts nicely with the richness of the pizza pockets.
Garlic Bread: The buttery, garlicky flavors of garlic bread can enhance the overall meal, inviting everyone to savor every bite.
Fruit Platter: A colorful fruit display adds a refreshing sweetness that balances the savory flavors of the pockets.
Top Tips for Perfecting Your Pizza Pockets
Perfecting your Homemade Easy Cheesy Pizza Pockets involves a few expert tips to elevate your dish:
Ingredient swaps: Experiment with different cheeses like provolone or gouda for a richer flavor or try a whole wheat dough for a healthier option.
Spice adjustments: Sprinkle some Italian herbs or red pepper flakes into the filling for an extra flavor boost.
Equipment advice: If you have an air fryer, consider cooking your pizza pockets there; they’ll turn out super crispy without excess oil.
Storage tips: Keep leftovers in an airtight container in the fridge for up to three days, or freeze them for longer storage.
Mistakes to avoid: Ensure you seal the edges carefully to prevent filling leaks during baking, which can mess up the texture of your pockets.
Variations & Add-Ins
Why not shake things up? Here are a few delicious variations of your pizza pockets worth trying:
Veggie Lover’s: Add bell peppers, olives, mushrooms, and spinach for a colorful, healthy twist.
Meat Feast: Go all out with a mix of pepperoni, sausage, and ham for a robust, meat-filled experience!
Buffalo Chicken: Swap traditional toppings for shredded chicken tossed in buffalo sauce, along with a little blue cheese, for a spicy kick.
Breakfast Version: Fill with scrambled eggs, cheese, and cooked bacon or sausage for a delightful breakfast option.
Kid-Friendly Version
To make these Homemade Easy Cheesy Pizza Pockets more appealing for kids, consider scaling back the spices and keeping the fillings simple. Opt for classic cheese and pepperoni combinations, ensuring all ingredients are light and familiar. Cute shapes can also make mealtime fun—use cookie cutters to shape the dough before filling, giving an appealing presentation that kids will love!
Storing and Reheating Tips
For any leftover pizza pockets, storing them properly is essential to maintain freshness and flavor. Place the cooled pizza pockets in an airtight container and refrigerate for up to three days. If you want to extend their life, consider flash-freezing them on a baking sheet before transferring them to a freezer-safe bag where they can be stored for up to three months.
When you’re ready to enjoy them again, reheating is easy! For the best texture, use an oven preheated to 350°F (175°C) and bake for about 10-12 minutes until heated through. Alternatively, you can microwave them for a quicker fix, but keep in mind that this may make the crust slightly less crisp. If you’ve frozen them, thaw them in the fridge overnight before reheating, ensuring they retain that delicious texture.
FAQs
What other sauces can I use besides pizza sauce?
You can experiment with pesto, alfredo sauce, or even barbecue sauce for unique flavor combinations. Just remember to keep the sauce volume moderate to avoid soggy pockets!
Can I make the dough in advance?
Absolutely! Prepare your dough ahead of time, and store it in the refrigerator for up to 24 hours. Make sure to bring it back to room temperature before rolling it out.
What should I do if my pizza pockets burst during baking?
This can happen if they are overfilled or not sealed properly. Always remember to leave a tiny bit of space as the cheese will melt and expand. Be mindful of how you pinch or crimp the edges to ensure a secure closure.
Can I use gluten-free dough?
Yes! There are many gluten-free pizza dough options available at stores or recipes online. Just make sure to follow instructions specific to the gluten-free dough you choose.
What’s the best way to reheat frozen pizza pockets?
For best results, place frozen pizza pockets directly into the oven preheated to 375°F (190°C) for about 18-20 minutes. This will help keep the crust crispy while thoroughly warming the filling.
Try it tonight and let me know how it turned out!
Homemade Easy Cheesy Pizza Pockets

Quick and tasty pizza pockets filled with cheese and customizable toppings, perfect for the whole family.
- Prep Time: 30 minutes
- Cook Time: 15 minutes
- Total Time: 45 minutes
- Yield: 4 servings
- Category: Snack
- Method: Baking
- Cuisine: American
- Diet: Vegetarian
Ingredients
- Pizza Dough (store-bought or homemade)
- Shredded Cheese (mozzarella and/or cheddar)
- Pizza Sauce (tomato marinara)
- Toppings (pepperoni, bell peppers, mushrooms, spinach)
- Olive Oil or Cooking Spray
Instructions
- Preheat your oven to 400°F (200°C).
- Roll out the pizza dough on a floured surface until it’s about ¼ inch thick and cut into squares or circles.
- Place a small spoonful of pizza sauce in the center of each piece of dough.
- Layer on cheese and additional toppings, being careful not to overfill.
- Fold the dough over the filling to create pockets and pinch the edges tightly to seal.
- Brush the tops lightly with olive oil or spray with cooking spray.
- Bake on a lined baking sheet for about 15 minutes until golden brown and bubbling.
- Allow to cool for a few minutes, then serve warm with extra pizza sauce for dipping.
Notes
Feel free to experiment with different fillings and sauces. These pockets can be frozen for later enjoyment.
Nutrition
- Serving Size: 1 pocket
- Calories: 250
- Sugar: 3g
- Sodium: 350mg
- Fat: 10g
- Saturated Fat: 4g
- Unsaturated Fat: 5g
- Trans Fat: 0g
- Carbohydrates: 30g
- Fiber: 2g
- Protein: 12g
- Cholesterol: 25mg
Keywords: pizza pockets, easy recipe, cheesy snacks, family-friendly meals, quick dinner