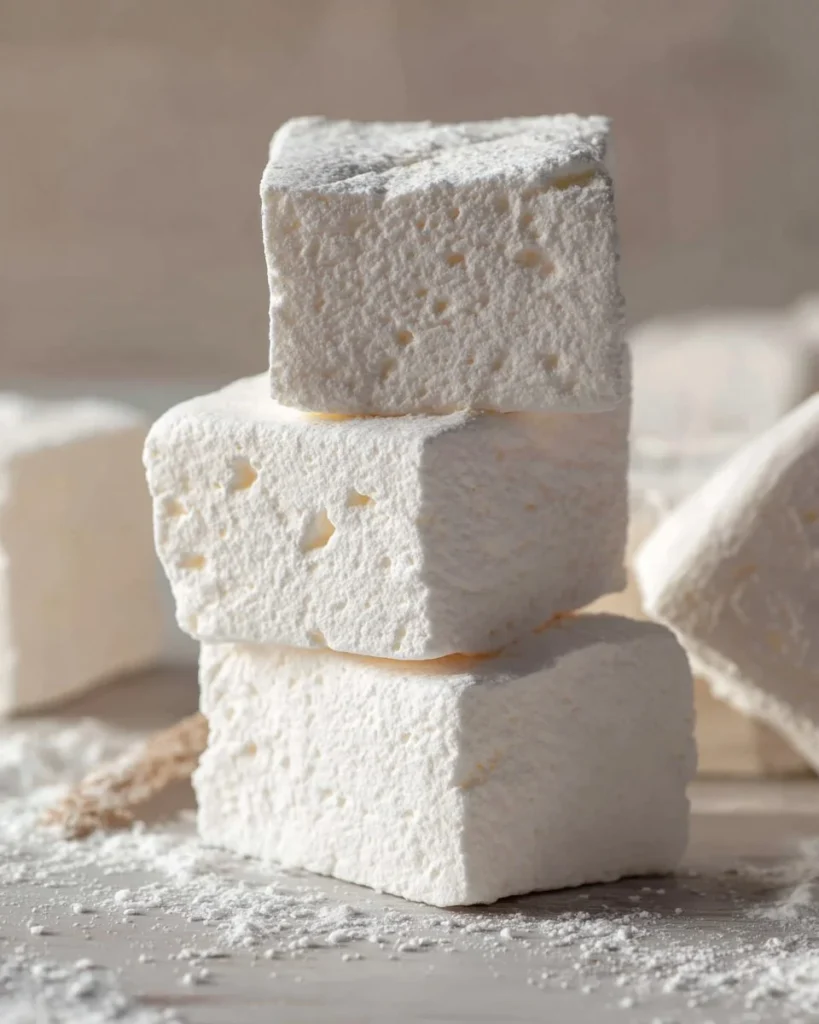
Homemade Marshmallows
These light, pillowy Homemade Marshmallows are a small kitchen triumph. Fresh marshmallows have a tender, bouncy texture that melts on the tongue, a sweet clean sugar flavor brightened by warm vanilla, and a faint, inviting aroma of vanilla and buttered sugar. They are soft and slightly chewy at the center with a delicate powdered coating that keeps them from sticking. This recipe is ideal for gifting, topping hot chocolate, making s’mores, or turning a simple dessert into something special. If you enjoy hands-on baking projects, these marshmallows are a satisfying treat to make from scratch. For a cozy night in, pair them with a mug of cocoa and enjoy their homemade charm. If you want to try other comforting homemade snacks while your marshmallows set, try a savory option like easy homemade Spaghetti Os with meatballs for dinner.
Ingredients
- 1/3 cup (40g) confectioners’ sugar, For dusting the pan and coating the cut marshmallows so they do not stick.
- 3 Tablespoons (24g) cornstarch, Mixed with the confectioners’ sugar to make a nonstick dusting for the pan and the marshmallows.
- 3/4 ounce (21g) unflavored gelatin (3 standard 1/4-ounce packets), The setting agent that gives marshmallows their structure and bounce.
- 1 cup (240ml) cold water, divided, Half used to bloom the gelatin and half used in the sugar syrup.
- 1 cup (325g) light corn syrup, Keeps the marshmallows soft and prevents crystallization.
- 1 and 1/2 cups (300g) granulated sugar, Provides sweetness and body to the marshmallow.
- 1/4 teaspoon salt, Balances the sweetness and enhances flavor.
- 1 Tablespoon pure vanilla extract, Added at the end for a warm, classic marshmallow flavor.
Step-by-Step Instructions
Prepare the pan. Spray a 9×13 inch baking pan with nonstick cooking spray, then dust it thoroughly with a mixture of the confectioners’ sugar and cornstarch. Shake out excess so the coating is even. This will make removing the marshmallow easier.
Bloom the gelatin. In a medium bowl, sprinkle the gelatin over 1/2 cup of the cold water. Let it sit undisturbed for about 5 minutes so the gelatin absorbs the water and becomes spongy. This step ensures a smooth, lump-free marshmallow.
Make the sugar syrup. In a saucepan, combine the remaining 1/2 cup cold water, the light corn syrup, the granulated sugar, and the salt. Heat over medium, stirring until the sugar dissolves. Once dissolved, stop stirring and let the mixture come to a boil. Cook until the syrup reaches 235 to 240 degrees F on a candy thermometer.
Combine syrup and gelatin. Remove the saucepan from the heat and let it cool for 5 minutes. With your mixer on low speed, slowly pour the hot syrup into the bloomed gelatin bowl. Pour carefully to avoid splashing and to protect your mixer.
Whip until glossy. Increase the mixer speed to high and whip the mixture until it becomes very thick and glossy, about 10 to 15 minutes. In the last minute of whipping, add the vanilla extract so its flavor is bright and well incorporated.
Transfer to the pan. Pour the marshmallow mixture into the prepared 9×13 pan and use an offset spatula to smooth the top. Lightly dust the surface with the remaining confectioners’ sugar and cornstarch mixture if you like.
Let set and cut. Let the marshmallow sit uncovered at room temperature for at least 6 hours or until fully set. Once firm, invert the pan onto a dusted cutting board, peel away the bottom, and cut into squares with a sharp knife or pizza cutter dusted with the sugar mixture. Dust the edges of the cut marshmallows with the remaining sugar mixture to prevent sticking.
Store. Place the marshmallows in an airtight container at room temperature. They will keep up to 2 weeks if stored properly.
Recipe Details
- Prep Time: 15 minutes active
- Cook Time: 10 minutes (syrup cooking)
- Total Time: 6 hours 25 minutes (includes at least 6 hours setting time)
- Servings: about 36 marshmallow squares
- Calories: approximately 66 calories per marshmallow
Tips, Storage & Variations
- Tips: Use a reliable candy thermometer for accurate syrup temperature. When whipping, be patient; the mixture needs time to reach full volume. If the marshmallow is sticky after cutting, dust more of the sugar and cornstarch mixture on the edges. For easier cutting, oil and dust your knife or use a lightly oiled bench scraper.
- Storage: Store marshmallows in a single layer or separated by parchment in an airtight container at room temperature for up to 2 weeks. Do not refrigerate, as moisture will make them sticky.
- Freezing: To freeze, place the marshmallows in an airtight container with layers separated by parchment paper. Freeze up to 3 months and thaw at room temperature before serving.
- Flavor variations using existing ingredients only: Increase the vanilla to a full 2 teaspoons for a stronger vanilla note, or omit the vanilla completely for a neutral, very sweet marshmallow. You can also vary the dusting ratio to use more cornstarch for a drier exterior. If you want a slightly chewier marshmallow, let it whip a minute longer within the recommended time.
For a different snack while your marshmallows set, try making homemade cheesy breadsticks or keep the kitchen fun with homemade easy cheesy pizza pockets.

FAQ
How long do homemade marshmallows last?
Homemade marshmallows last up to 2 weeks stored in an airtight container at room temperature.Can I skip the corn syrup?
No, corn syrup helps prevent sugar crystallization and keeps the marshmallows soft.Why did my marshmallows not set?
They may not have had enough gelatin or the syrup was not cooked to the correct temperature. Ensure gelatin was fully bloomed and syrup reached 235 to 240 degrees F.Can I make these vegetarian?
This recipe uses unflavored gelatin, which is not vegetarian. Use a vegetarian gelatin alternative if you need a vegetarian version, but note results may vary.Is a candy thermometer necessary?
Yes, a candy thermometer ensures the syrup reaches the correct temperature for proper texture.Can I flavor the marshmallows differently?
You can only use the vanilla in this ingredient list. Adjust the amount of vanilla for subtle variation or omit it for a plain marshmallow.
People Also Ask
What makes marshmallows fluffy?
Proper whipping of gelatin and hot syrup incorporates air, creating the fluffy structure.Can I double this recipe?
Yes, you can double the ingredients but use a larger pan and a heavy-duty mixer if possible.Why do marshmallows turn sticky?
Humidity, improper dusting, or storing in an unsealed container can make them sticky.How do I cut marshmallows neatly?
Use a sharp, lightly oiled knife or pizza cutter dusted with the sugar mixture for clean cuts.Can I use powdered gelatin instead of packets?
Yes, use an equivalent weight of powdered gelatin; here the recipe uses 3/4 ounce in total.What is the purpose of cornstarch in the dusting mix?
Cornstarch helps absorb surface moisture and prevents sticking better than confectioners sugar alone.Is it safe to eat unwhipped marshmallow syrup?
The syrup is very hot and should not be eaten until it cools and is whipped into the gelatin; it will burn and is not safe to taste while hot.Will refrigeration help the marshmallows set faster?
Refrigeration can introduce condensation and make marshmallows sticky; room temperature setting is best.
Conclusion
I hope you enjoy making these Homemade Marshmallows and sharing them with friends and family. For extra tips and troubleshooting advice, the article How To Make Homemade Marshmallows (Foolproof Guide) has helpful step-by-step guidance, and How to Make Homemade Marshmallows – Sally’s Baking Addiction offers useful variations and visuals. If you try this recipe, please come back and share how your marshmallows turned out. Enjoy the cozy sweetness.
PrintHomemade Marshmallows
These light, pillowy Homemade Marshmallows are perfect for gifting, topping hot chocolate, or enjoying on their own.
- Prep Time: 15 minutes
- Cook Time: 10 minutes
- Total Time: 385 minutes
- Yield: 36 marshmallow squares 1x
- Category: Dessert
- Method: No-Bake
- Cuisine: American
- Diet: Vegetarian (if using vegetarian gelatin alternative)
Ingredients
- 1/3 cup (40g) confectioners’ sugar, for dusting
- 3 tablespoons (24g) cornstarch, for dusting
- 3/4 ounce (21g) unflavored gelatin (3 standard 1/4-ounce packets)
- 1 cup (240ml) cold water, divided
- 1 cup (325g) light corn syrup
- 1 and 1/2 cups (300g) granulated sugar
- 1/4 teaspoon salt
- 1 tablespoon pure vanilla extract
Instructions
- Prepare the pan by spraying a 9×13 inch baking pan with nonstick cooking spray, then dust it with a mixture of confectioners’ sugar and cornstarch.
- Bloom the gelatin by sprinkling it over 1/2 cup cold water in a bowl and letting it sit for 5 minutes.
- Make the sugar syrup by combining remaining cold water, light corn syrup, granulated sugar, and salt in a saucepan over medium heat until dissolved, then let it boil until it reaches 235-240°F.
- Combine the syrup and bloomed gelatin by slowly pouring the hot syrup into the bowl with gelatin while mixing on low speed.
- Whip the mixture on high speed until very thick and glossy, about 10-15 minutes, adding vanilla extract in the last minute.
- Transfer the mixture into the prepared pan and smooth the top with an offset spatula.
- Let the marshmallows set uncovered at room temperature for at least 6 hours.
- Store in an airtight container at room temperature for up to 2 weeks.
Notes
A candy thermometer is recommended for this recipe to ensure proper texture.
Nutrition
- Serving Size: 1 marshmallow
- Calories: 66
- Sugar: 14g
- Sodium: 35mg
- Fat: 0g
- Saturated Fat: 0g
- Unsaturated Fat: 0g
- Trans Fat: 0g
- Carbohydrates: 15g
- Fiber: 0g
- Protein: 0g
- Cholesterol: 0mg
Keywords: marshmallows, homemade, dessert, sweet treat, candy